

Install your eSIM a few hours before your trip and activate it when you arrive.
Select "Install with QR" if you have the code on another device to scan it.
If you can't scan the QR code, select "Install manually."
Before starting the installation, it's important to know:
- You must have the QR code on another screen or device to scan it with your phone's camera.
- Make sure you have a stable internet connection during this process.
- Keep in mind that the QR code can only be scanned once.
- Manual installation codes can only be used once.
- Do not delete the eSIM from your device, as you won’t be able to use it again.
Open your email
Check the email where we sent you the QR code and the manual installation codes "SM-DP+ Address" and "Activation Code." If you didn’t receive them, please, contact us.
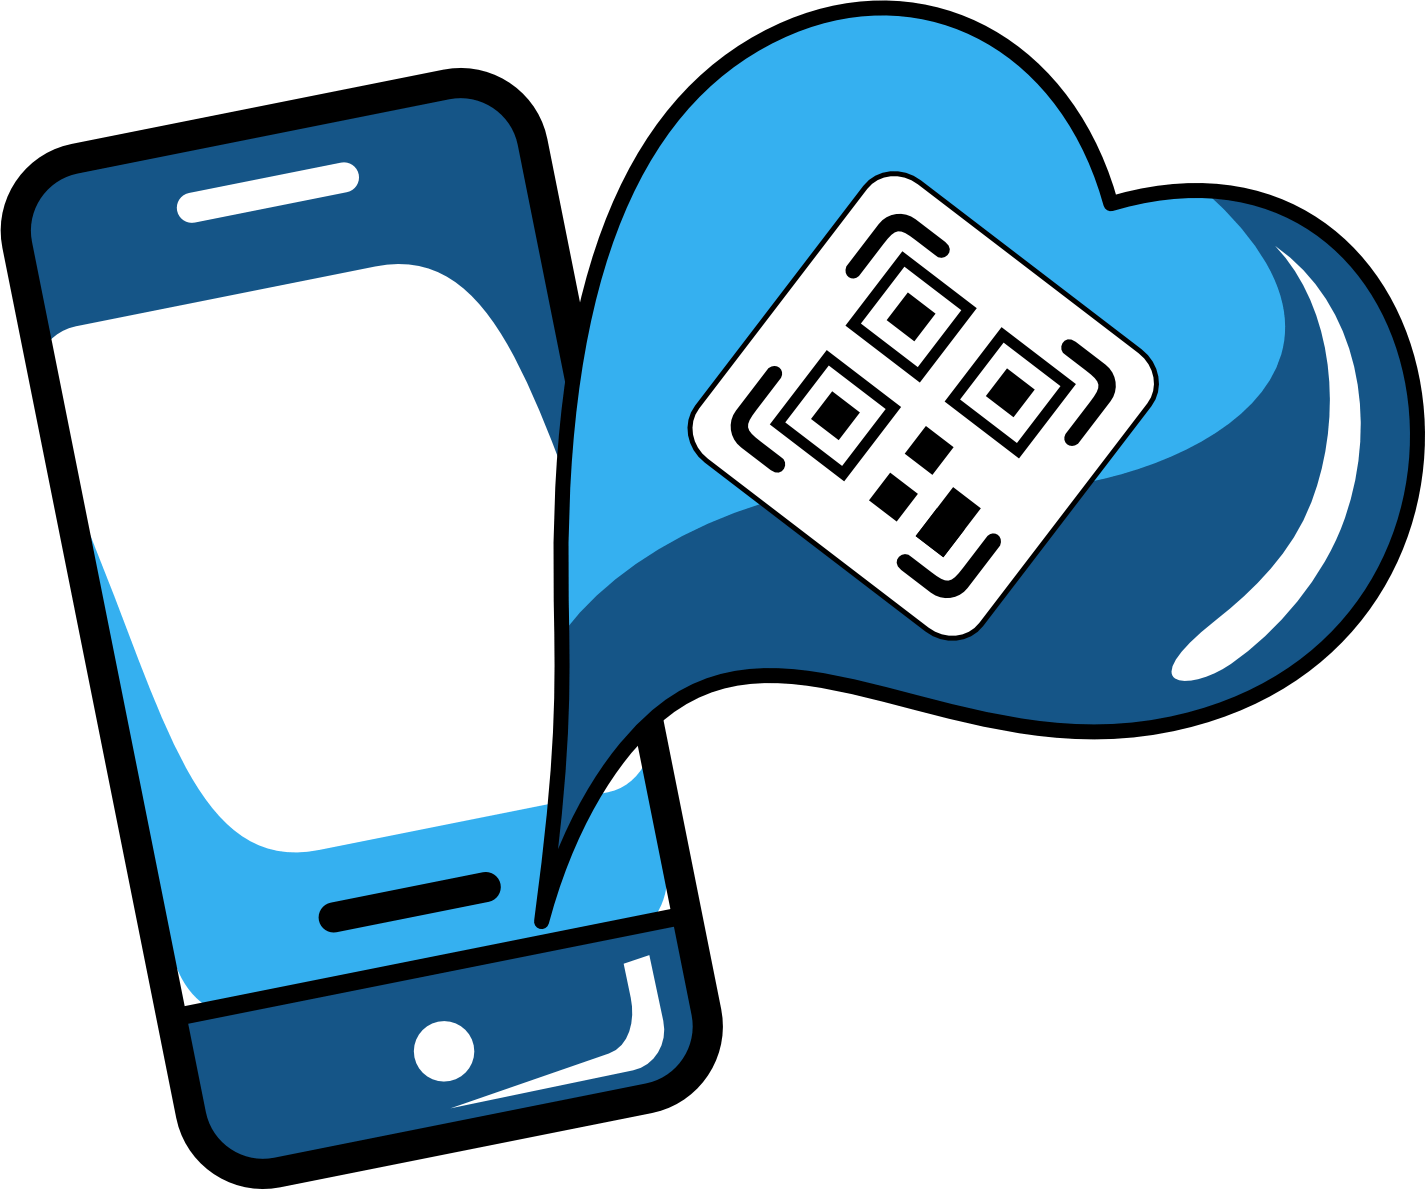
QR code installation
Open Settings and tap “Internet and Networks,” then the “+” icon next to your main plan. Now, tap “Do you want to download an eSIM?” and then “Next” to proceed.
Manual installation
At the bottom of the screen, tap “Need Help?” You’ll find a highlighted option that says “Install Manually.” Enter the code carefully and follow the installation steps.
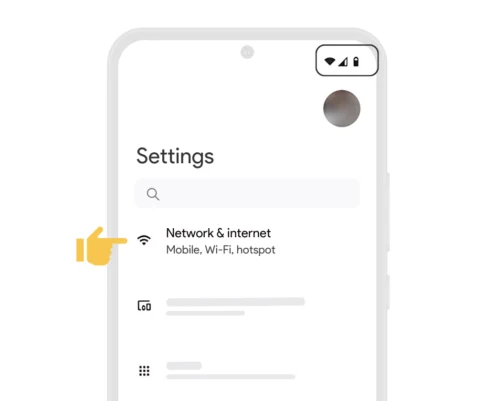
01. Settings
Go to Settings and then to “Networks and Internet .” Ensure you have a stable internet connection (Wi-Fi or mobile data).
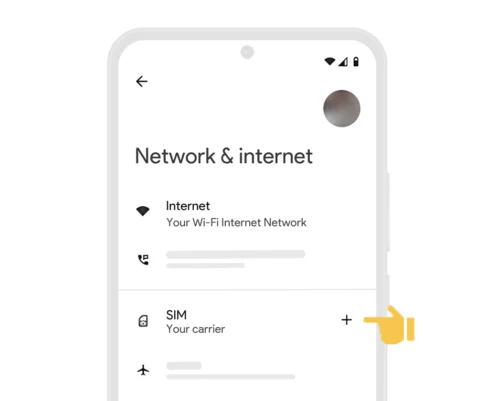
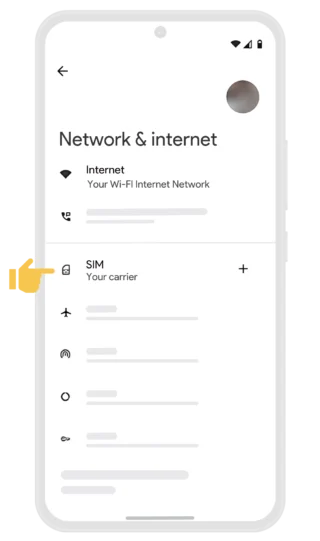
02. New eSIM
In “Internet and Networks,” tap the “+” icon next to your main mobile plan to add your new plan.

03. Add eSIM
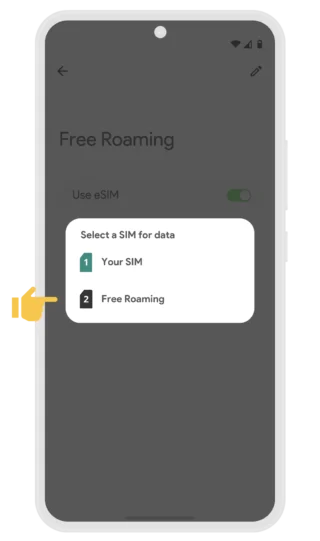
Tap “Do you want to download a SIM?” A message will appear asking if you want to use 2 SIMs; tap “Yes.”
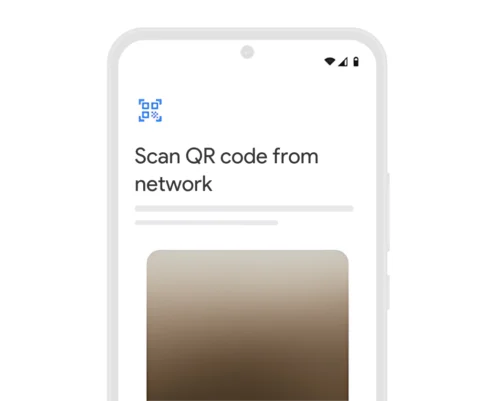
04. QR code
Place the QR code within the box displayed on the screen. Wait a few seconds while your new mobile plan is identified.
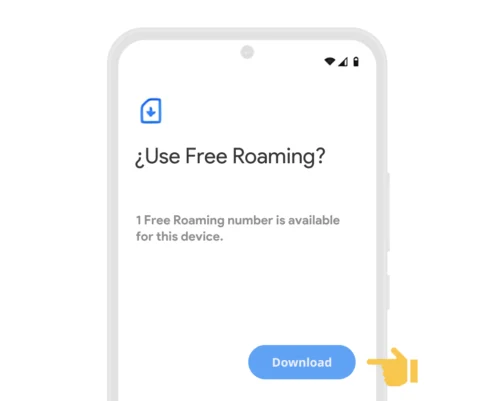
05. Download
Wait a few seconds until the plan is identified. Tap “Download” to add it to your device.
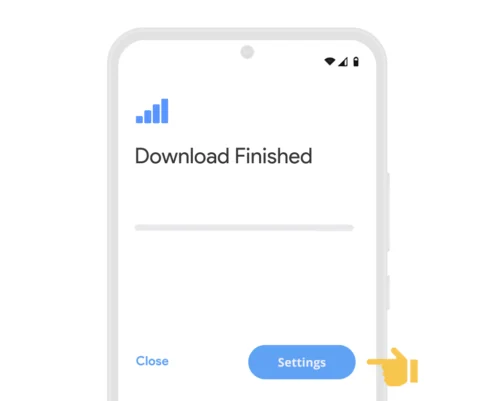
06. Confirmation
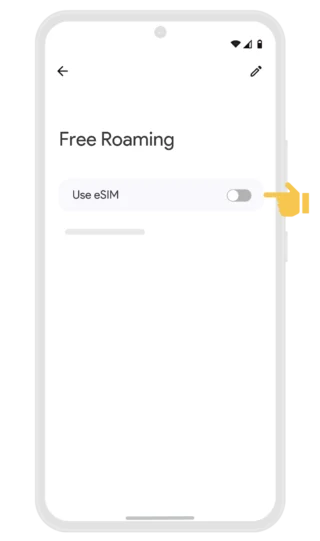
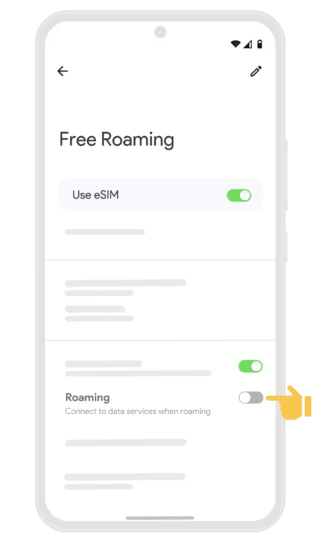
Your Free Roaming eSIM is now installed. You can turn data roaming on or off by tapping “Settings.”
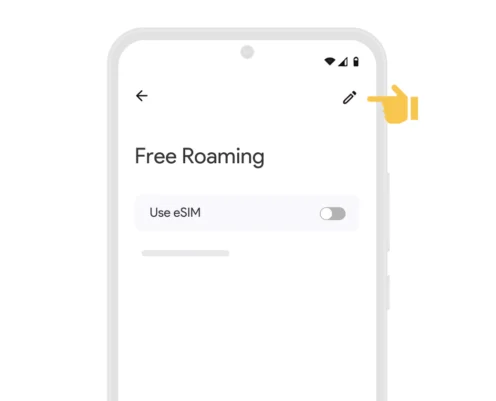
07. Label
If you want to change the name of your eSIM, tap on your new plan and select the edit icon in the top corner.
01. Settings
Go to Settings and then to “Networks and Internet .” Ensure you have a stable internet connection (Wi-Fi or mobile data).
02. New eSIM
In “Internet and Networks,” tap the “+” icon next to your main mobile plan to add your new plan.
03. Add eSIM
Tap “Do you want to download a SIM?” A message will appear asking if you want to use 2 SIMs; tap “Yes.”
04. Help
Scroll down and tap “Need Help?” There, you’ll find an option to manually install your eSIM.
05. Enter manually
Now, scroll to the bottom of your device and tap the “Enter Manually” option.
06. Code
Copy and paste the manual installation code to install your eSIM. Tap “Continue” and wait a few seconds.
07. Download
Wait a few seconds until the plan is identified. Tap “Download” to add it to your device.
08. Confirmation
Your Free Roaming eSIM is now installed. You can turn data roaming on or off by tapping “Settings.”
09. Label
If you want to change the name of your eSIM, tap on your new plan and select the edit icon in the top corner.
To activate:
You need to be at the destination for which you purchased your eSIM.


¿Having trouble with the installation or activation of your eSIM?
If you need assistance, feel free to use our Online Chat.